

Apple pie has become a powerful symbol of Americanness that resonates within the hearts of millions. “American as apple pie” is actually quite fitting since, like the United States itself, the humble apple pie evolved from various immigrant roots and traditions. If you happen to be in Washington apple country in July, don’t miss the annual Apple Pie Jamboree in Pateros, Washington where you will be able to taste generations of apple pie traditions by the slice!
For many, apple pie was first tasted at the family table; the result of a delicious labor of love performed by a grandmother or other family member. There are as many versions of apple pie as there are people that make them. And therein lies the true beauty of the apple pie. It’s a culinary classic steeped in common history that can be interpreted or reinvented to suit the tastes and desires of individual families.
Making great apple pie takes a bit of practice but once the basics are mastered, it opens up a world of possibility. Follow our tips below and learn how to make perfect apple pie, every time.
Click to try our Grandma’s Classic Apple Pie recipe.
Lesson 1: a pie is only as good as its apples
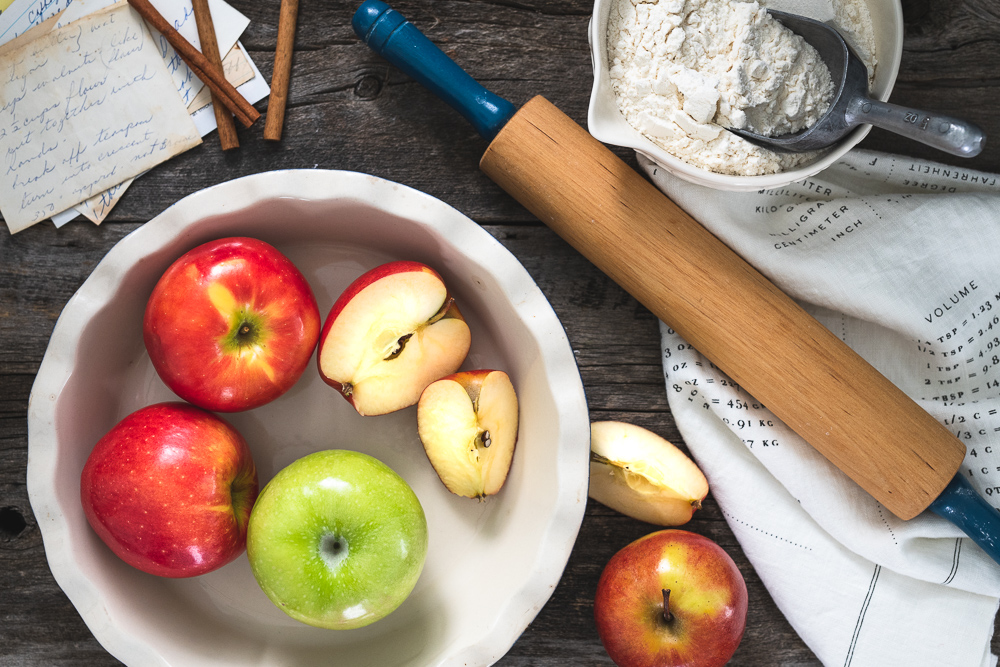
Select your apple varieties carefully, choosing firm varieties that hold their shape and won’t turn mushy when baked. Use different apple varieties in the same pie, for example mixing tart varieties with sweeter ones. This will add interest to the pie, depth of flavor and help you use up any leftovers you have on hand!
The best apple varieties for apple pie include: KORU®, SugarBee®, Granny Smith, Braeburn, Honeycrisp, and Fuji.
Click here to read about the different Chelan Fresh apple varieties available.
Lesson 2: anatomy of a pie crust

There are many ways of making pie crust and varying opinions among bakers as to what makes an exceptional pie crust. At the end of the day, personal preference counts for a lot and you’ll need some trial and error to find your ideal pie crust. Having said that, it helps to know about the elements that make up the dough:
Flour
The standard for basic pie dough remains all-purpose flour but some bakers prefer to use pastry flour for its lower protein content that yields a very tender crust. Specialty flours are increasingly used in baking for health reasons (ex. whole wheat flour or gluten-free flours) but can be trickier to use. We suggest apple pie beginners start with all-purpose flour.
Fat
Generally, this refers to either butter or shortening. All-butter crusts are flaky, have great flavor but can be tricky to work with, while shortening crusts are dairy-free, melt-in-your-mouth and easier to work this. It is also possible to use a combination of butter and shortening in the same dough. Whichever fat you choose, make sure it is very cold before being cut into the dry ingredients.
Liquid
The liquid added to make pie dough is water, sometimes combined with a little vinegar. The vinegar (an old grandmother’s trick) is thought to make the dough more tender by inhibiting gluten development that can make the dough tough and keeping the dough from oxidizing before it’s baked. Another trick is to keep the liquid very cold with ice cubes, ensuring that it won’t melt the fat when added to the other dough ingredients.
The amount of liquid needed to make the crust will vary according to several factors including environmental conditions (humidity in the air, etc.) and ingredients used (ex. dryness of flour). To make the best possible crust, the least amount of liquid needs to be used. The trick is to add just enough liquid for the dry ingredients to come together without feeling dry.
Lesson 3: handling and cooking crust
Making and baking the dough isn’t complicated but here are some tips to get it right each and every time:
Mixing
Over-mixing the dough develops the gluten in the flour, resulting in tough dough. Do not overmix or you’ll end up with a chewy crust. Recipes will call for “cutting in” the fat into the dry ingredients to make sure the fat doesn’t melt and the dough isn’t overworked. This is traditionally done with two knives working in opposite directions or with a pastry cutter. This technique can also be achieved with a food processor but should only be done with small pulses to avoid overworking the dough. For best results, use the food processor to combine the flour and fat then transfer the flour mixture to a bowl to gently mix in the ice water.
Shaping
The top crust is your chance to get creative and make the pie a work of art. A lattice pie top (pictured above) is a classic choice for American apple pie but there are other ways to adorn pie. Shaped cut-outs can be used to vent the top crust and add visual interest. Shapes can also be added along the edges of the pie to create a stunning effect.
Last touches before baking
Brush an egg or milk wash on the crust before baking to ensure a beautiful golden-brown finish. After the wash, you can also sprinkle some coarse sugar on the crust to add crunchiness and sweetness to the crust. Both of these techniques must be used before baking the pie.
Cooking Make sure your oven is at the right temperature by using an oven thermometer. It’s amazing how many oven thermostats don’t accurately reflect the actual temperature inside. Place the pie on the lowest rack of the oven to prevent “soggy bottom” (a terrible but sadly common pie-baking mishap) and keep the underside of the pie crisp. If the edges of the pie start to get overly brown, use a pie shield (store bought or made of aluminum foil) to cover the sides of the pie while allowing the center to keep browning.
